Welcome to SampleServe!
Please enter your contact information and we will quickly reply with a personalized quote as well as instructions on next steps. Thanks!
Download "Getting Started Checklist"

This is the document that helps you track your progress and guides your learning on how to use the SampleServe sampling and reporting platform. It’s simple to follow and the document is full of links to videos and other information on how to use the platform. The checklist is broken down into 6 easy steps and each step should take only 30 to 40 minutes, for a total time of 3 to 4 hours. You complete the document on our own, while we provide the guided instructions via scheduled web meetings. If you are inclined, you are free to proceed at your own schedule and we are available for questions when you need it.

SampleServe Pathway to Success
Create Your Account and Workspace URL
A workspace is a unique URL created for you to use as your place to store your SampleServe projects. The best way to think of it is that it's similar to a file cabinet. This “file cabinet” is where you place individual project folders. You can have as manyURLs (file cabinets) as you like. The projects places in URL (file cabinet)will typically be grouped together in like categories so that one URL is used for each office location or maybe each client with multiple projects, or some combination thereof.


Project Setup
In this step, the goal is to create an individual project(s). The primary objective in this step is to get all the historical information loaded for the project. Information like sample locations, well construction details (if any), historical field data, historical lab data, sitemaps, and other images like cross-sections, etc... We will then locate the sample locations/monitoring wells on each of those maps and/or images.
- Start New Project (tutorial)
- Enter or Upload Sample Locations/Well Construction Data (tutorial)
- Upload Sample Location Photos (tutorial)
- Add Maps and/or Images to Your Project (tutorial)
- Locate Sample Locations on Your Maps and Images (tutorial)
- Generating a satellite Map from GPS Locations (tutorial)
- Upload Historical Lab Data (tutorial)
- Upload Historical Field Data (tutorial)
- Selecting or Adding Your Lab (tutorial)
Creating a Work Scope
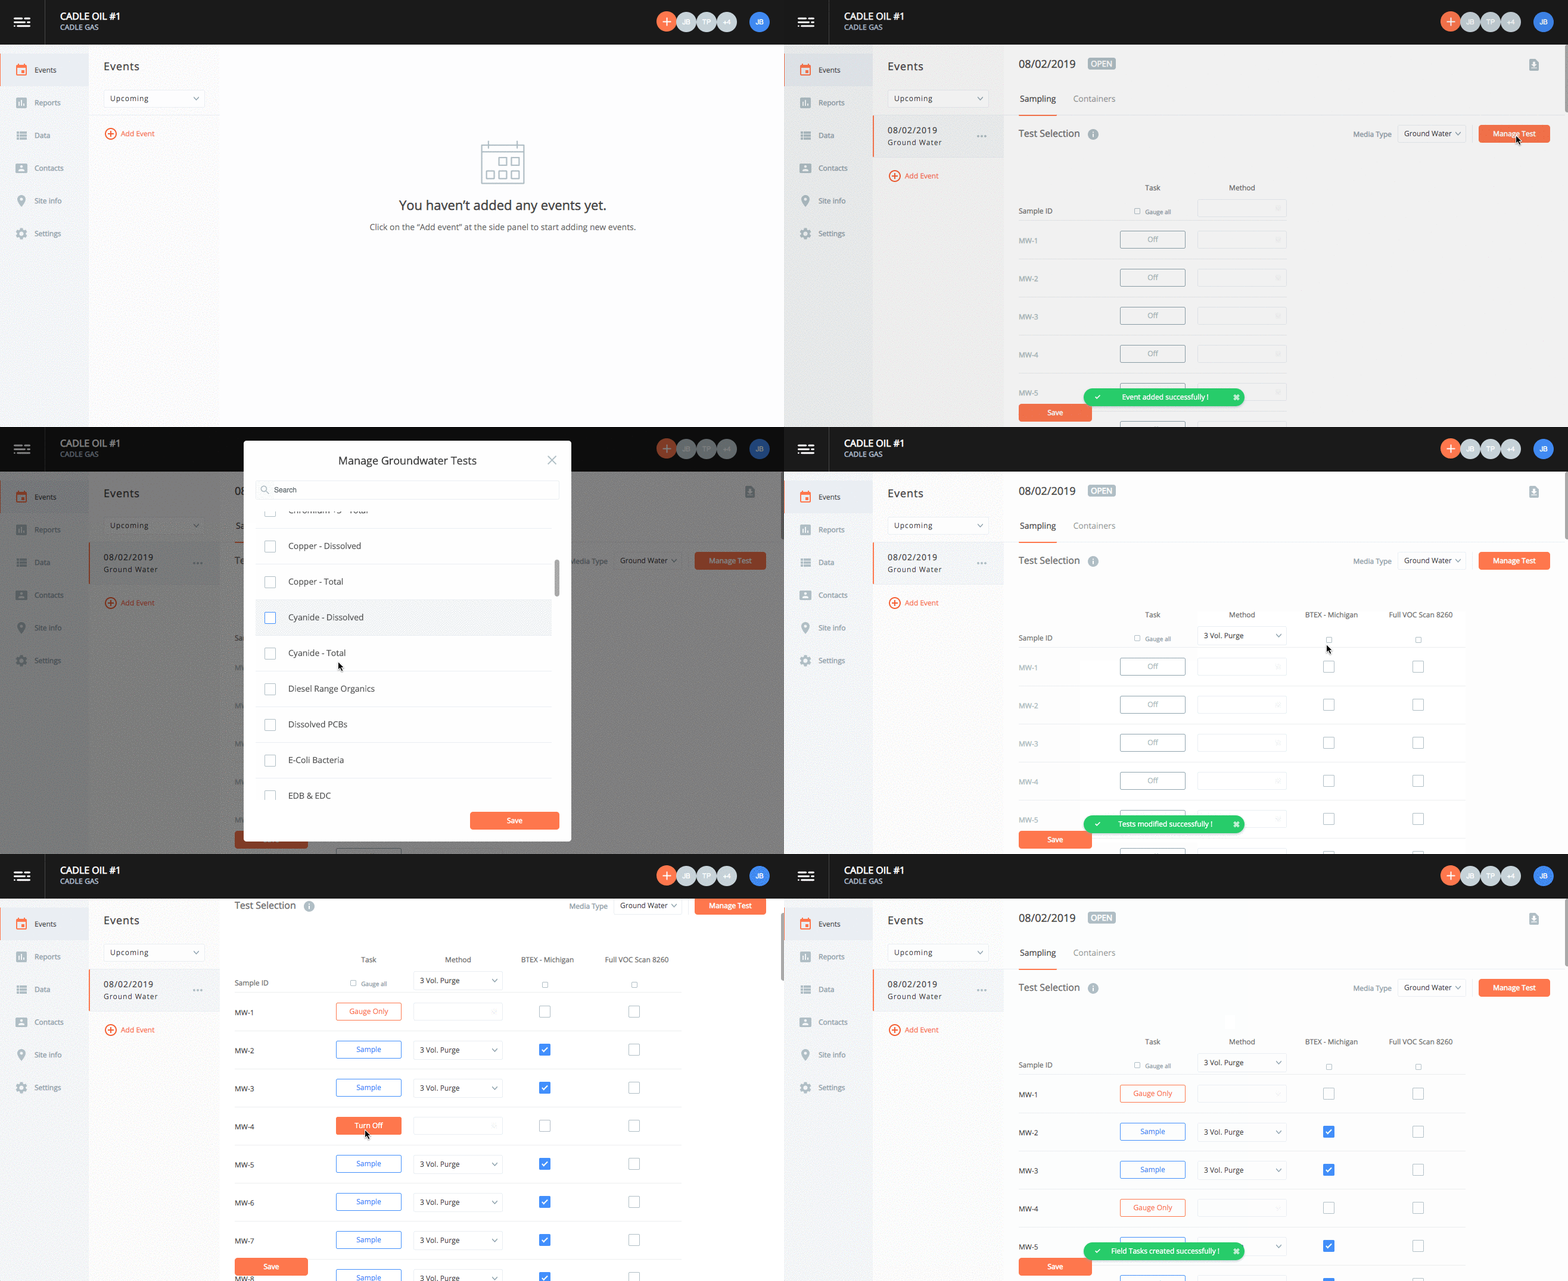
In this step, the goal is to create and schedule a sampling events to be completed in the future. Commonly called a“work scope” or a “sampling event”. You will learn how to schedule a work scope event and pull the analytical parameters (tests) directly from the selected laboratory interface. You’ll learn how to add those parameters to each sample location, and how to change sample methods or just collect water level elevation only. We will also save time by coping an existing work scope to create a new work scope in the future. You will also learn how to generate sample bottle orders and enter lab billing information. We will then review how to create and utilize custom field data collection forms.
- Scheduling a Sampling Event and Creating the Work Scope (tutorial)
- Duplicate and/or Edit a Sampling Event Work Scope (tutorial)
- Confirming Bottle Order/Lab Billing Info (tutorial)
- Creating and/or Selecting a Customized Data Collection Form(s)
- Saving Your Work Scope and Confirming Field Tech Invite (tutorial)
- View and Add/Edit Project Personnel Contact Info (tutorial)
- View Completed Event Work Scopes (tutorial)
- Pre-Print Sample Labels (No Field Printer) (tutorial)
- Pre-Print a Chain-Of-Custody (when using a non-participating lab) (tutorial)


Mobile Field App and Data/Sample Collection
In this session, the goal is to teach you how to use the field app. Load the app onto a device, login to your account, and then synchronize your account and download your pending field event work scope(s).You’ll learn how to sort sample locations and find your location quickly and efficiently. We’ll teach you how to collect the data and samples and print sample labels in the field. In addition, you’ll learn how to work with multiple people in the field and share up-to-date information with others in the field.
- Load Mobile Field Application (Compatible Android Device Here)
- Pair Printer (Mobile Field Printers Available Here) (tutorial)
- Download Work Scopes to Device (tutorial)
- Take Sample Location Photos (tutorial)
- Collect Field Data and Samples (tutorial)
- Low Flow Groundwater Sampling Data Entry Process (tutorial)
- Adding New Sample Locations (tutorial)
- Print Bottle Labels (tutorial)
Transfer Samples to Lab
Transferring Data with SampleServe is meant to be quick and easy. No paper is needed when using a Field Printer. Data can be pushed electronically to any lab.


Reporting & Graphics
(30 Mins)
In this session, the goal is to teach you how to create detailed and informative custom graphics quickly and efficiently. We’ll teach you how to create all the various graphics listed below and how to save each setting so that when you come back to the site at a later date, your settings are saved and graphics can be completed even faster.
Set up a new project in a matter of minutes.
SampleServe works out of the box. Simply upload your soil or groundwater data.
Create your project
Get set up in less than 5 minutes. Create your project, add your team, add your site details and your up and running.
Add your data
Set up a new site in minutes by uploading your well, field, and analytical data. Import via excel or CSV.
Download your report
After reviewing new data, download your report.


